How to Acclimate Solid Hardwood Flooring Before Installation
Solid hardwood flooring is one of the most beautiful and durable investments a homeowner can make. Its natural character warmth and longevity set it apart from almost every other material available. But achieving a flawless and long-lasting result depends on more than just quality materials and skilled installation. One of the most important yet frequently overlooked steps in the process is knowing how to acclimate solid hardwood flooring before a single plank is laid. Skipping or rushing this stage is one of the leading causes of post-installation problems including warping buckling gapping and joint failure. Getting acclimation right sets the foundation for everything that follows.
This guide explains what hardwood floor acclimation is why it matters how to do it correctly and what factors influence wood flooring acclimation time in different environments.
What Is Hardwood Floor Acclimation
Hardwood floor acclimation is the process of allowing wood flooring to adjust its moisture content to match the conditions of the room where it will be installed. Wood is a natural material that continuously responds to the humidity and temperature levels around it. It absorbs moisture from the air when conditions are humid and releases moisture when conditions are dry. As it absorbs or releases moisture the wood expands or contracts dimensionally.
When flooring arrives from a warehouse or manufacturing facility it has been stored in conditions that may be very different from those in your home. If the planks are installed before they have adjusted to the actual room environment they will continue to change in dimension after installation. This post-installation movement stresses the joints between planks, damages the locking mechanisms and can cause the floor to cup bow or develop unsightly gaps.
The goal of acclimation is to bring the moisture content of the wood as close as possible to the equilibrium moisture content of the installation environment before the floor goes down. This minimises post-installation movement and gives the finished floor its best chance of remaining flat stable and intact over time.
Why Solid Hardwood Requires More Careful Acclimation Than Other Products
Not all flooring products require the same level of acclimation attention. SPC and LVP flooring are fully waterproof and dimensionally stable products that are largely unaffected by changes in humidity. Laminate flooring is water-resistant and less reactive than solid wood. Engineered hardwood with its multi-layer plywood or fiberboard core is more stable than solid wood but still benefits from acclimation.
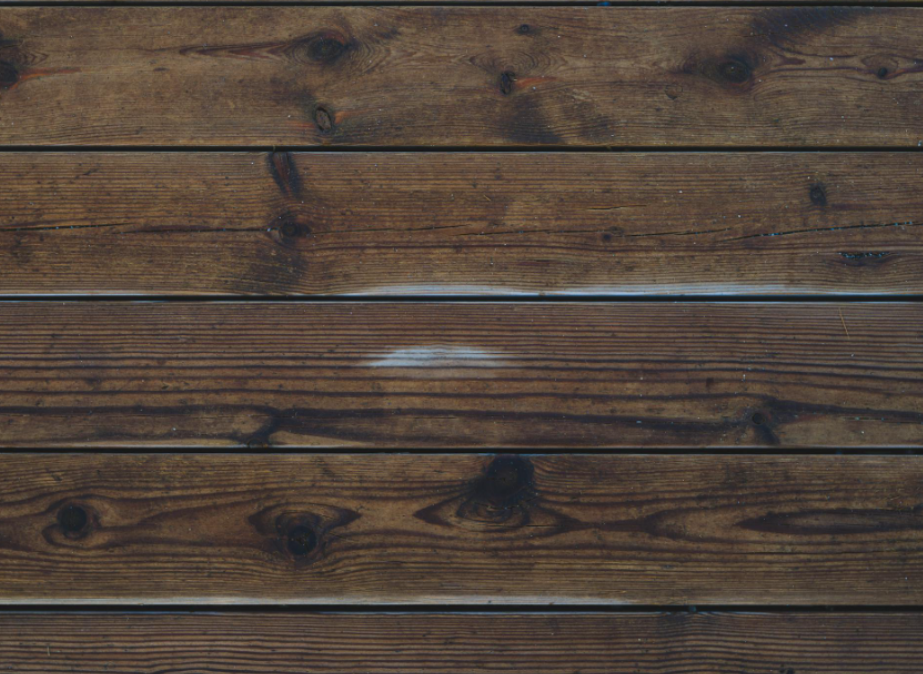
Solid hardwood is the most reactive of all flooring types because it is a single piece of natural timber throughout its full thickness. There are no stabilising core layers to moderate the expansion and contraction response. Every millimetre of the plank reacts to changes in ambient moisture content. The wider and thicker the plank the more significant the potential movement.
This is why understanding how to acclimate solid hardwood flooring is especially critical compared to other materials. The consequences of inadequate acclimation are more severe with solid wood and the damage that results is often difficult or impossible to reverse without removing and replacing the floor.
You can explore how solid hardwood compares to engineered alternatives in this guide on understanding the differences between solid and engineered wood flooring.
How Wood Responds to Moisture and Temperature
To appreciate why acclimation works it helps to understand the basic science of how wood behaves. Wood cells are hygroscopic which means they naturally attract and hold water molecules from the surrounding air. When the relative humidity of the air increases wood absorbs more moisture and its cells swell causing the plank to expand across its width and to a lesser degree its length. When humidity decreases the cells release moisture and the plank contracts.
Temperature also plays a role because warm air holds more moisture than cold air. A room that is heated in winter becomes drier which causes wood to contract. The same room in summer with higher humidity causes the wood to expand. These seasonal cycles are normal and well-managed installed hardwood handles without visible damage because adequate expansion gaps were provided at installation.
The problem arises when flooring is installed without allowing this adjustment to happen naturally beforehand. If planks that are too dry are installed in a humid room they expand after installation and push against each other causing buckling or raised joints. If planks that are too moist are installed in a dry room they shrink after installation and develop gaps between boards.
For more information on how wood flooring responds to seasonal changes this guide on seasonal flooring maintenance tips provides useful context for ongoing care after installation.
Step-by-Step Guide to Acclimate Solid Hardwood Flooring
Step 1: Complete All Major Construction and Wet Work First
Before bringing hardwood flooring into the room all major construction work must be finished. This includes painting, plastering tiling , grouting and any other wet trades that introduce moisture into the space. These activities raise the humidity level of the room significantly and if hardwood flooring is stored in the room during this period it will absorb excess moisture and acclimate to conditions that do not represent the actual living environment.
Allow all wet work to dry completely and allow the room to return to its normal living conditions before beginning the acclimation process. This is a critical prerequisite that many homeowners miss when planning their installation timeline.
Step 2: Establish Normal Living Conditions in the Room
The room must be at its normal operating temperature and humidity before and throughout the entire acclimation period. Turn on your HVAC system heating or air conditioning as appropriate for the season. The room should be conditioned to the temperature and humidity levels it will experience during normal everyday use.
Most hardwood flooring manufacturers recommend an indoor temperature between 60 and 80 degrees Fahrenheit and a relative humidity between 35 and 55 percent for both acclimation and ongoing use. If your home uses radiant floor heating turn the system on and bring it to its normal operating temperature well before acclimation begins.
Do not attempt to acclimate flooring in a room that is unheated, uncooled or poorly ventilated. The conditions during acclimation must match the conditions the floor will experience permanently.
Step 3: Bring the Flooring Into the Room
Once the room is at its normal living conditions bring the hardwood flooring boxes into the space. The planks need to be in the actual room where they will be installed, not in an adjacent hallway, a garage or a different floor of the house. Conditions vary from room to room and the flooring must respond specifically to the environment where it will live.
Place the boxes in a location that allows air to circulate around them. Do not stack them flat directly on top of each other in a sealed pile as this prevents airflow from reaching the planks inside. Many installers open the box ends or remove the planks and stack them in loose open piles separated by small spacers that allow air to move between each board. This significantly improves the effectiveness and speed of the acclimation process.
Step 4: Allow Sufficient Wood Flooring Acclimation Time
Wood flooring acclimation time varies depending on several factors including the species of wood, the thickness and width of the planks, the gap between the initial moisture content of the planks and the target equilibrium moisture content and the current conditions in the room.
As a general guideline most solid hardwood flooring requires a minimum of 3 to 5 days of acclimation in normal residential conditions. However many manufacturers and flooring professionals recommend allowing 5 to 7 days to be confident that adequate adjustment has occurred. In more challenging conditions such as extremely dry climates, very humid environments or unusually wide and thick planks the acclimation period may need to extend to 10 days or longer.
The key point is that wood flooring acclimation time should never be treated as a fixed number to rush through. It is complete when the moisture content of the planks has stabilised at a level appropriate for the room conditions, not simply when a certain number of days have passed.
Step 5: Measure Moisture Content with a Wood Moisture Meter
The most reliable way to confirm that acclimation is complete is to use a wood moisture meter. This tool measures the moisture content of the wood directly and gives you a percentage reading. Professional flooring installers rely on moisture meters as a standard part of their process and they are widely available for purchase or rental.
Take readings from several planks across multiple boxes to get a representative picture of the moisture content across the entire batch. Compare your readings against the target equilibrium moisture content for your region and season. Most flooring manufacturers specify the acceptable moisture content range in their installation documentation.
Also test the moisture content of the subfloor and check that the difference between the subfloor reading and the flooring reading is within the acceptable range specified by the manufacturer. A moisture content difference that is too large between the subfloor and the flooring indicates that either the subfloor or the flooring needs more time to stabilize before installation proceeds.
Step 6: Check Subfloor Conditions Before Proceeding
While the hardwood is acclimating, use this time to finalise your subfloor preparation. The subfloor must be clean, flat dry and structurally sound before installing solid hardwood. Check for any areas that flex, squeak or feel soft underfoot and address those issues before laying the floor.
For concrete subfloors complete moisture testing before bringing the hardwood into the room as excess moisture from a concrete slab can interfere with the acclimation process and damage the finished floor. For timber subfloors check that all boards or panels are securely fastened and that the surface is level within the tolerances required by your flooring product.
Thorough subfloor preparation completed in parallel with acclimation ensures that you do not lose time and that installation can begin as soon as the flooring is ready. You can find detailed guidance on preparing for installing solid hardwood floors in this article on how to install solid hardwood floors and avoid common mistakes.
Factors That Affect Wood Flooring Acclimation Time
Several variables influence how long the acclimation process takes in any given situation. Understanding these factors helps you plan your project timeline accurately.
Wood Species: Different species have different densities and cell structures that affect how quickly they exchange moisture with the surrounding air. Denser species such as hickory or hard maple may take longer to acclimate than less dense species.
Plank Width and Thickness: Wider and thicker planks contain more wood mass and take longer to reach equilibrium throughout their full cross-section. Wide-plank flooring in particular requires extended acclimation time.
Initial Moisture Content: The further the initial moisture content of the flooring is from the target equilibrium moisture content of the room the longer acclimation will take. Flooring shipped from a region with very different climate conditions than your installation location may need more time.
Room Conditions: A room that is at the extreme end of acceptable humidity or temperature ranges will extend acclimation time. Rooms that are very dry or very humid require the wood to adjust more significantly before reaching equilibrium.
Airflow Around the Planks: Flooring stacked in open piles with good airflow between boards acclimation much faster than flooring left sealed in boxes. Maximising air circulation around the planks speeds up the moisture exchange process.
Common Acclimation Mistakes to Avoid
Even homeowners who understand the importance of hardwood floor acclimation sometimes make errors in execution that undermine the process. Here are the most frequent mistakes worth avoiding.
Acclimating in the Wrong Location: Storing flooring in a garage basement or hallway rather than the actual installation room is a very common error. Conditions in adjacent spaces do not represent the conditions the floor will experience permanently.
Not Conditioning the Room First: Bringing flooring into a room that is not yet at its normal living temperature and humidity means the wood adjusts to temporary conditions rather than permanent ones. Always establish normal room conditions before acclimation begins.
Leaving Planks in Sealed Boxes: Sealed packaging prevents air from reaching the wood and drastically slows the moisture exchange process. Open box ends or remove planks entirely to allow proper airflow.
Rushing the Timeline: Treating acclimation as a box-ticking exercise and proceeding after the minimum possible time regardless of actual moisture readings leads to post-installation problems. Allow adequate time and verify with a moisture meter before proceeding.
Skipping Acclimation Entirely: Some installers skip acclimation altogether to save time particularly when schedules are tight. This is one of the most consequential mistakes in the entire installation process. A full review of errors to avoid can be found in this article on mistakes to avoid when installing solid wood flooring for a flawless finish.
What Happens If You Skip Acclimation
The consequences of inadequate acclimation become visible in the weeks and months following installation as the wood continues to adjust to its environment after being fixed in place.
If planks are installed too dry they absorb moisture from the room environment and expand. Because the boards are already locked or nailed in position this expansion creates compressive stress between planks. The floor may bow or develop raised edges along the joint lines. In severe cases planks buckle upward in a visible wave across the floor.
If planks are installed too moist they release moisture and contract after installation. As each plank shrinks, gaps open between the boards. In wide-plank installations these gaps can become quite pronounced and allow dirt and debris to accumulate between the boards.
Both outcomes are difficult and expensive to correct after the fact. In many cases remediation requires removing and replacing the affected flooring entirely. This makes the time invested in proper acclimation one of the most cost-effective decisions in the whole project.
You can find a broader overview of installation errors and their consequences in this guide on top flooring mistakes and how to avoid them.
Maintaining Stable Conditions After Installation
The work of moisture management does not end with acclimation. Once the floor is installed keeping indoor humidity and temperature levels consistent is an ongoing responsibility that directly affects the long-term performance of the floor.
Use a humidifier during dry winter months to prevent the indoor humidity from dropping too low and causing the wood to contract excessively. Use a dehumidifier or air conditioning during humid summer periods to prevent excessive moisture absorption and expansion. The target range of 35 to 55 percent relative humidity should be maintained as consistently as possible throughout the year.
Address any plumbing leaks, appliance malfunctions or water intrusion issues promptly. Solid hardwood is not waterproof or water-resistant and prolonged exposure to moisture after installation can cause the same problems that inadequate acclimation produces.
For ongoing guidance on keeping your hardwood floor in excellent condition after installation refer to this guide on how to maintain and clean different types of flooring and this article on protecting your flooring from scratches and dents.
Conclusion
Understanding how to acclimate solid hardwood flooring is one of the most important skills any homeowner or installer can develop before beginning a wood floor project. The process is straightforward but it demands patience, accuracy and attention to the specific conditions of the installation environment. Proper hardwood floor acclimation that is confirmed with moisture meter readings rather than just a calendar count protects your investment and ensures that the beautiful floor you install today remains flat, stable and intact for decades to come.
At Parma Floors we offer a premium range of solid hardwood and engineered hardwood flooring crafted for lasting beauty and performance. Our team is available to guide you through every stage of your project from product selection through to installation advice and long-term care. Contact us today to explore our collections and get expert support for your flooring project.
Frequently Asked Questions
Q: How long does wood flooring acclimation time take for solid hardwood?
A: Most solid hardwood flooring requires a minimum of 3 to 7 days of acclimation under normal conditions. Wider planks denser species or environments with extreme humidity levels may require up to 10 days or longer before installation should proceed.
Q: Do I need to open the boxes during hardwood floor acclimation?
A: Opening box ends or removing planks entirely allows air to circulate around each board and significantly improves acclimation speed and effectiveness. Sealed boxes prevent moisture exchange and can result in uneven or incomplete acclimation across the batch.
Q: What temperature and humidity should the room be during acclimation?
A: The room should be maintained at its normal living conditions throughout acclimation. Most manufacturers recommend a temperature between 60 and 80 degrees Fahrenheit and a relative humidity between 35 and 55 percent during both acclimation and ongoing use after installation.
Q: Can I acclimate solid hardwood flooring in a garage or basement?
A: No. The flooring must be acclimated in the actual room where it will be installed. Garages and basements have different temperature and humidity conditions that do not represent the permanent environment of the installation space and will produce inaccurate acclimation results.
Q: What happens if I skip acclimation when installing solid hardwood floors?
A: Skipping acclimation commonly leads to post-installation warping buckling or gapping as the wood continues adjusting to room conditions after it has been fixed in place. Correcting these issues often requires removing and replacing the affected flooring which is costly and avoidable.